Welcome to Geotech!

Portable Magnetic Gradiometer JPMG: Launching a New Era of Smart Exploration
In resource exploration, efficiency and accuracy are crucial. The JPMG Portable Magnetic Gradiometer, an innovative product by Shenzhen Huafley Technology Co., Ltd., is revolutionizing magnetic exploration with its outstanding performance and intelligent operation. This article delves into the core functions and easy – operation features of the JPMG magnetic gradiometer.

I. Three Major Modes of JPMG: Adapting to All – Terrain Exploration
The JPMG Portable Magnetic Gradiometer has three key modes to meet various terrain and exploration needs.
Mobile Mode
In mobile mode, the JPMG enables on – the – move measurements. Operators can collect magnetic data while walking in the field. Perfect for large – area preliminary surveys, it quickly captures geomagnetic variations. With a high – precision OCXO and multi – satellite systems (GNSS, GPS, BeiDou, GLONASS), it ensures accuracy and stability. Its lightweight and portable design enhances field efficiency.
Walking Mag Mode
Walking Mag mode allows continuous measurements at fixed intervals, generating observation profiles. This is vital for precise exploration and anomaly tracking. Combined with real – time magnetic curve display, operators can instantly monitor field changes, adjust paths promptly, and efficiently Investigate unusual areas.
Base Station Mode
For long – term monitoring and diurnal correction, the Base Station mode is ideal. The device provides a reference for mobile measurements. Working with mobile stations, it effectively eliminates diurnal interference, ensuring accurate data. This mode enables JPMG to perform excellently in complex electromagnetic environments, providing a solid foundation for high – precision magnetic surveys.
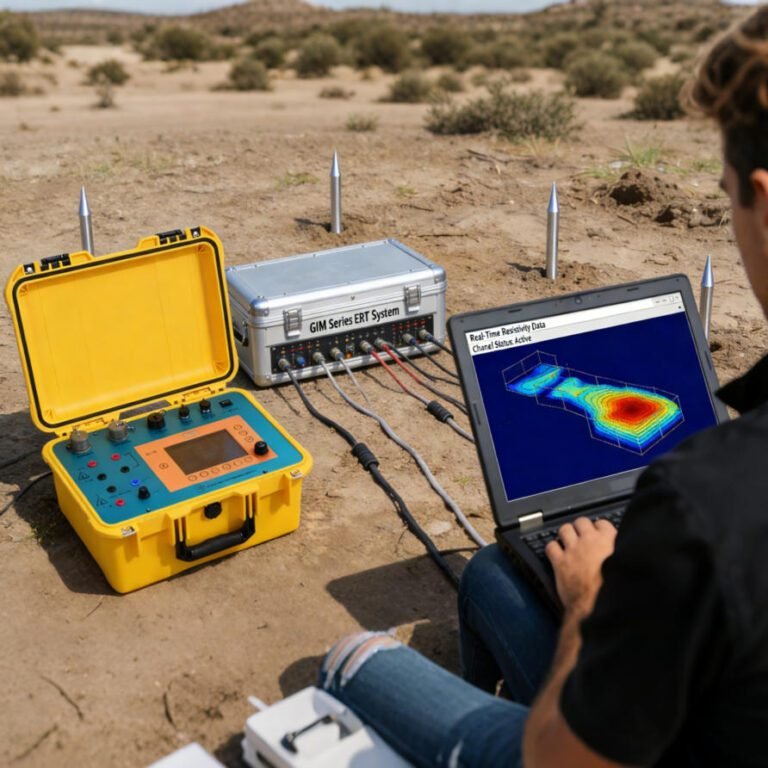
II. Real – time Magnetic Curves + 3D Profiles: Making Data Intuitive
The JPMG Portable Magnetic Gradiometer excels in data visualization. It features a host screen displaying real – time magnetic curves for immediate results. When anomalies are detected, operators can swiftly respond, increase measurement density, or conduct further surveys.
Moreover, the JPMG supports 3D profile generation. By processing and analyzing measurement data, users can create 3D magnetic field distribution maps. These maps visually display subsurface geological structures and orebody shapes, aiding geologists in understanding orebody spatial distribution. In practice, 3D profiles are crucial for guiding drilling and mining operations, bringing significant economic benefits to exploration projects.
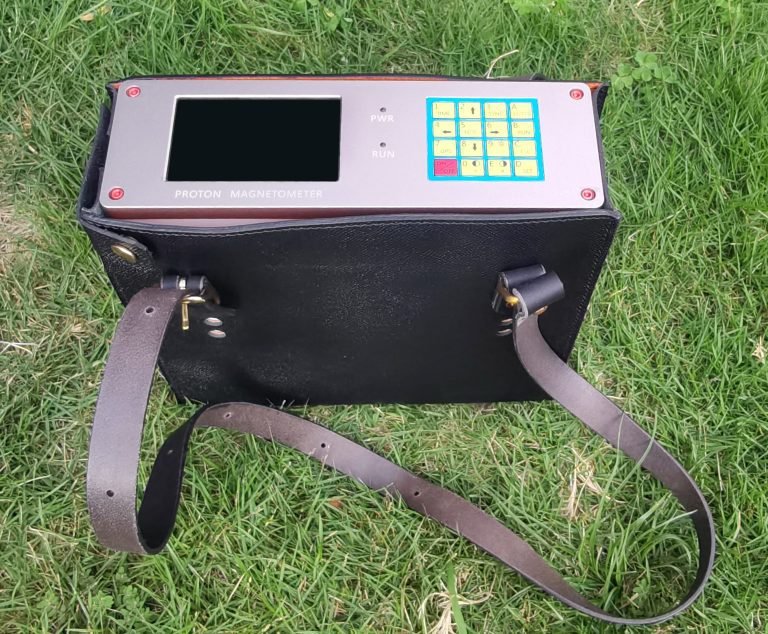
III. From Power – Up to Mapping: A 10 – Step Quick Guide to the JPMG Proton Magnetometer
Here’s a 10 – step quick guide to help users get started with the JPMG Proton Magnetometer:
Step 1: Preparation
Before measurement, carefully read the instruction manual. Prepare all necessary equipment, including the probe, rods, host, GPS, battery, and charger. Check for any damage to ensure proper operation.
Step 2: Installing the Probe and Rods
Mount the probe on the aluminum rod’s top, avoiding impacts to prevent oil leakage. Securely connect the rods and insert the probe cable into the host’s SENSOR port.
Step 3: Connecting GPS and Accessories
Connect the GPS cable to the host’s GPS port. Attach other accessories like a shoulder strap for easy field operation.
Step 4: Battery Installation and Charging
Insert the rechargeable lithium battery into the host’s battery compartment. Use the standard charger to ensure sufficient power. It’s advisable to fully charge the battery before first use.
Step 5: Power – Up and System Settings
Long – press the ON/OFF button for 3 seconds to power on. Within 5 seconds, press the BIOS key to enter the system settings. Adjust parameters like Y – peak, Y – base point, and clock. Set appropriate screen brightness and contrast.
Step 6: Magnetometer Calibration
Calibrate the JPMG Proton Magnetometer in a magnetically stable area. Keep the device away from ferromagnetic objects during calibration. Record the results for future use.
Step 7: Measurement Parameter Settings
In the host’s measurement interface, set parameters based on exploration needs. These include working mode, file name, and system position. Also, configure measurement mode, speed, and cycle time to meet measurement requirements.
Step 8: Starting the Measurement
After preparations, begin measuring by pressing the corresponding button. Maintain device stability and monitor real – time magnetic curves to ensure smooth measurement.
Step 9: Data Viewing and Exporting
Post – measurement, view data in the data viewing interface. Ensure data integrity and accuracy. Export data via USB or a 10 – pin waterproof RS – 232 serial port for further analysis.
Step 10: Power – Off and Equipment Maintenance
After measurement, long – press the ON/OFF button for 3 seconds to power off. Store the equipment properly. Clean and maintain the probe and rods to ensure long – term reliability.
In summary, the JPMG Portable Magnetic Gradiometer offers excellent performance, intelligent operation, and strong data visualization. It’s a great choice for resource exploration, providing efficient and precise solutions for various projects. Choose JPMG to embark on your smart exploration journey!